
Creating a Parameter Effect
Parameter effects let viewers choose a quantity, an option, a color, or an integer range. In the current Blueprint API, define them with SetupParameterEffect and handle them through OnParameterEffectTrigger.
Create the Effect Definition
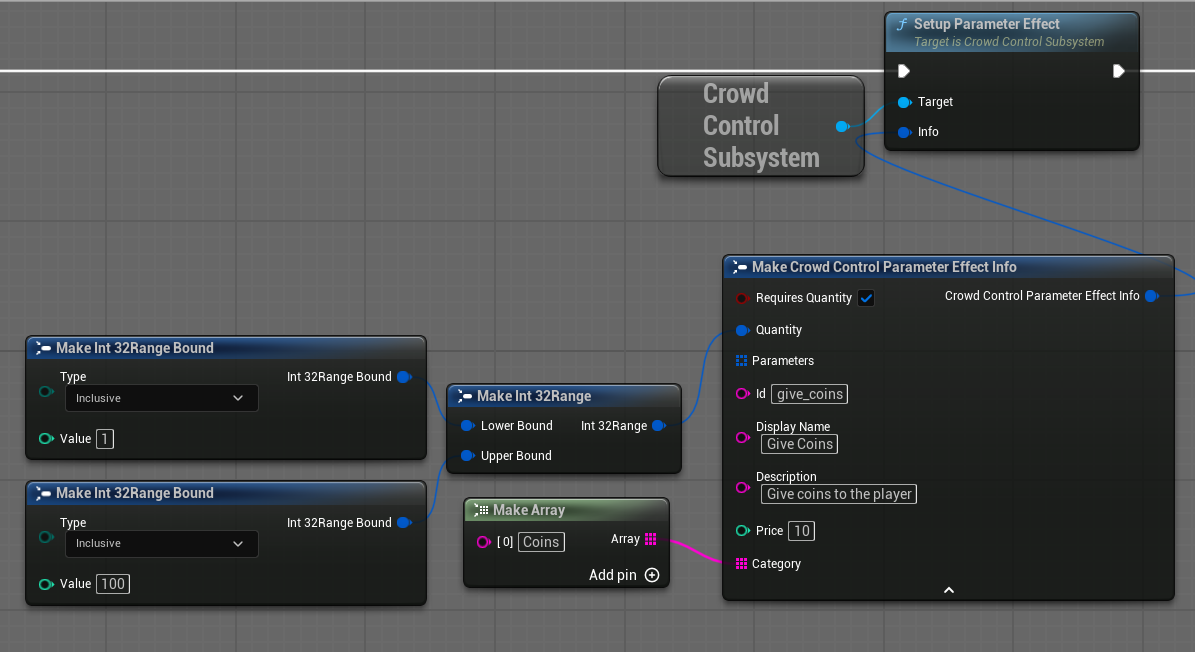
From OnSessionReady, create an FCrowdControlParameterEffectInfo and call Setup Parameter Effect.
Fill in the base fields:
id: unique lowercase ID with no spaces,displayName,description,price,category.
Optional Quantity
Enable RequiresQuantity and set the inclusive quantity range when viewers should choose how many times the effect is applied. The default range is 1 through 99.
Option Parameter
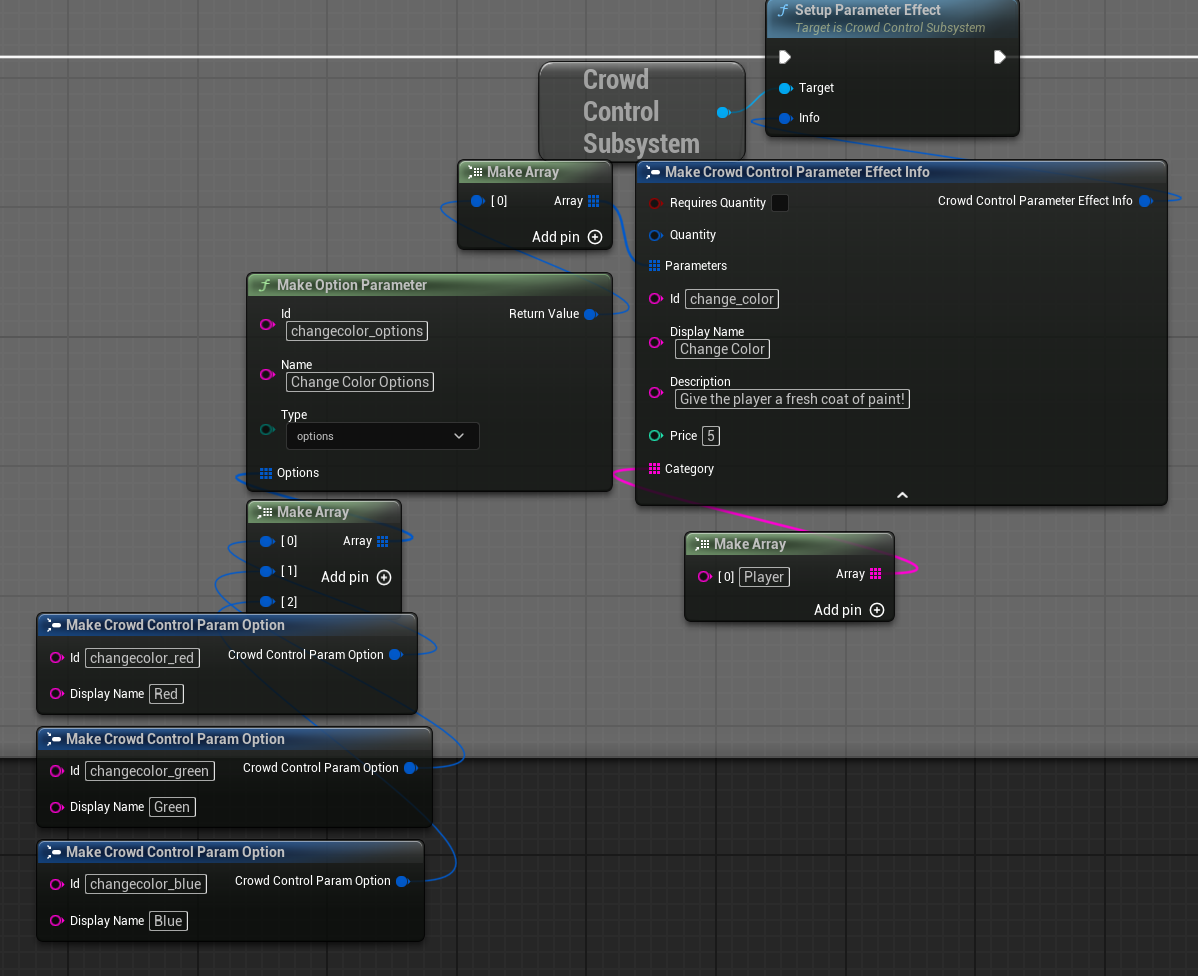
Use Make Option Parameter from UCrowdControlFunctionLibrary.
- Choose a stable parameter ID, such as
color. - Set its viewer-facing name, such as
Color. - Set the type to
OPTIONS. - Add
FCrowdControlParamOptionvalues. Each option needs a stableidand a viewer-facingDisplayName. - Add the resulting parameter to the effect's
parametersarray.
Example option IDs might be red, green, and blue. Use the IDs, not the display labels, in gameplay logic.
Integer Range Parameter
Use Make Min Max Parameter with a parameter ID and inclusive integer bounds. The helper creates a MinMax parameter and uses the ID as its name.
Hex Color Parameter
Create an FCrowdControlParameter with:
_idset to the stable parameter ID,nameset to the viewer-facing name,typeset toHexColor.
The request value is a hexadecimal color string.
Bind the Trigger
Bind OnParameterEffectTrigger once, preferably before registering the effect. The delegate provides:
ID: request ID,DisplayName,OptionalQuantity: quantity as a string in this delegate,Params:FJsonObjectWrappercontaining selected parameter IDs and values,EffectID,ViewerName.
Branch on EffectID, read the expected values from Params, validate them, and then apply the effect.
TIP
OnEffectRequestReceived also reports quantity as an int32 for notifications, but it does not contain the full parameter object and does not replace the trigger delegate.
Respond to the Request
Every trigger requires one response using ID:
- Effect Success or Effect Success With Message
- Effect Failure Temporary when the current game state prevents the effect
- Effect Failure Permanent when the request can never be valid
Use a failure message to tell the viewer why the request was rejected. You may respond after asynchronous work completes, but retain the correct request ID and respond exactly once.
Component Limitation
UCrowdControlEffectComponent can receive quantity and parameter JSON when a matching request is routed to it, but its Blueprint registration path currently creates only instant or timed definitions. Use SetupParameterEffect plus the global parameter delegate for a Blueprint-only parameter effect.
C++ integrations can register a parameter definition and route it to a component with RegisterEffectComponent.
Test Cases
Before submission, verify:
- every option ID is handled,
- range boundaries are accepted,
- malformed or missing parameter data produces a failure response,
- quantity scaling does not overflow or bypass gameplay limits,
- every branch sends exactly one response.
Continue with Starting a Session and Testing Effects.