Crowd Control Effect Registration
TIP
The newest plugin versions include Effect Components - a per-effect actor component that handles registration, trigger routing, and responses for you. See Effect Components for the recommended approach. The delegate-based flow below still works and remains fully supported.
If using the example project open BP_CrowdControlExampleCharacter. We will explore the setup and key functions to register effects with crowd control and trigger functions when effects are purchased.
When you're working on your own Package of effects, you will need to submit your game to be setup. These functions can be in your controller or any other locally available classes. For the example project we used the Character blueprint for simplicity.
When the character starts on begin play we are registering the callback for OnCommandIDChanged if the character is locally controlled. 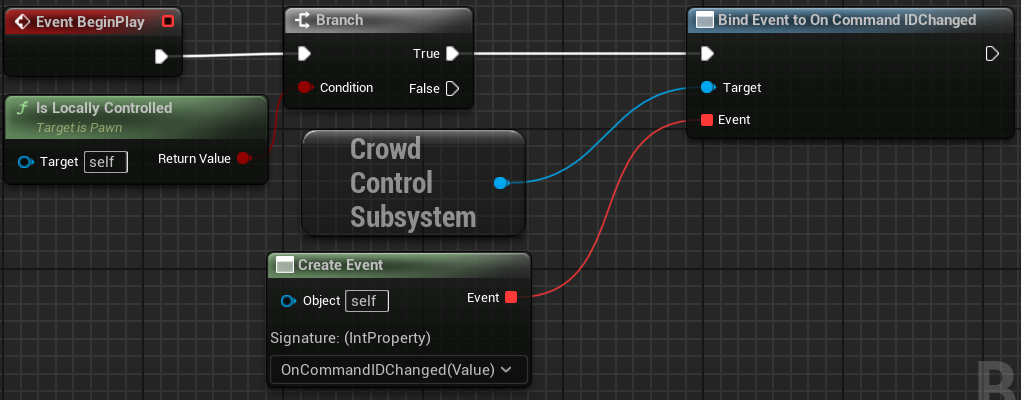
When the ID Change event triggers it will run a local event on the character we created, OnCommandIDChanged. We check to make sure that, CC is initialized as we will use this function to register effects, there is a small delay added to make sure everything is settled prior to registration. 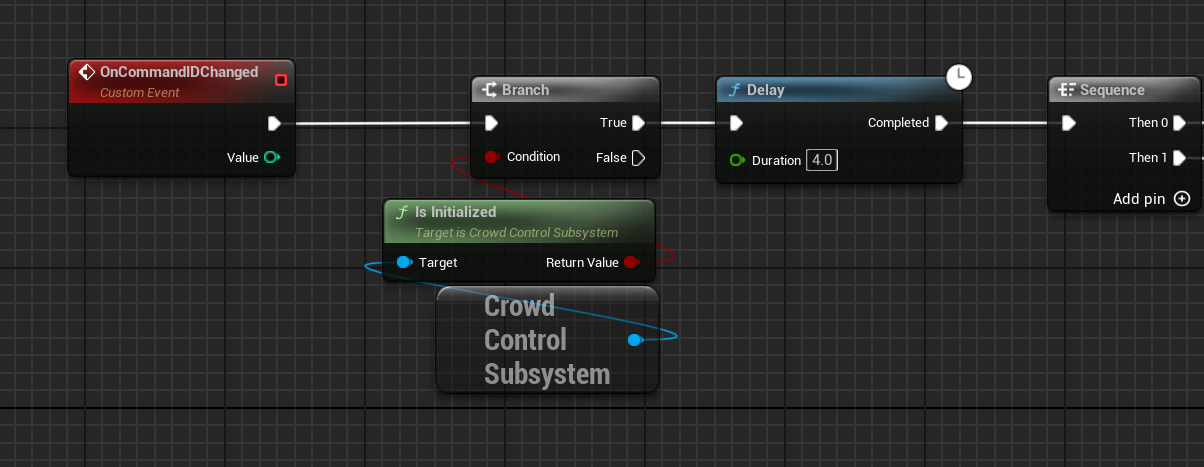
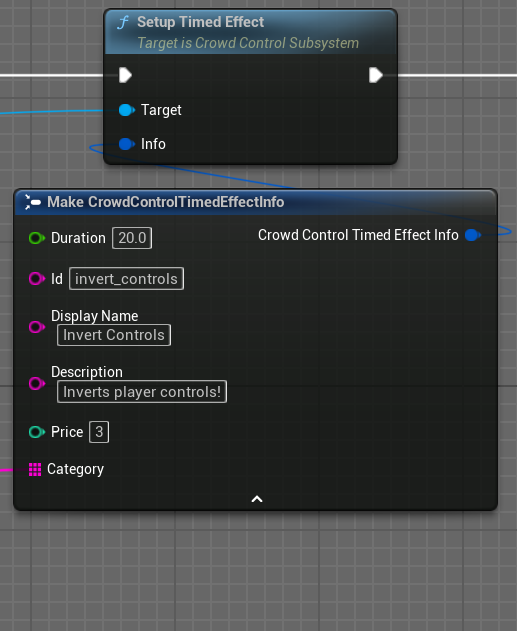
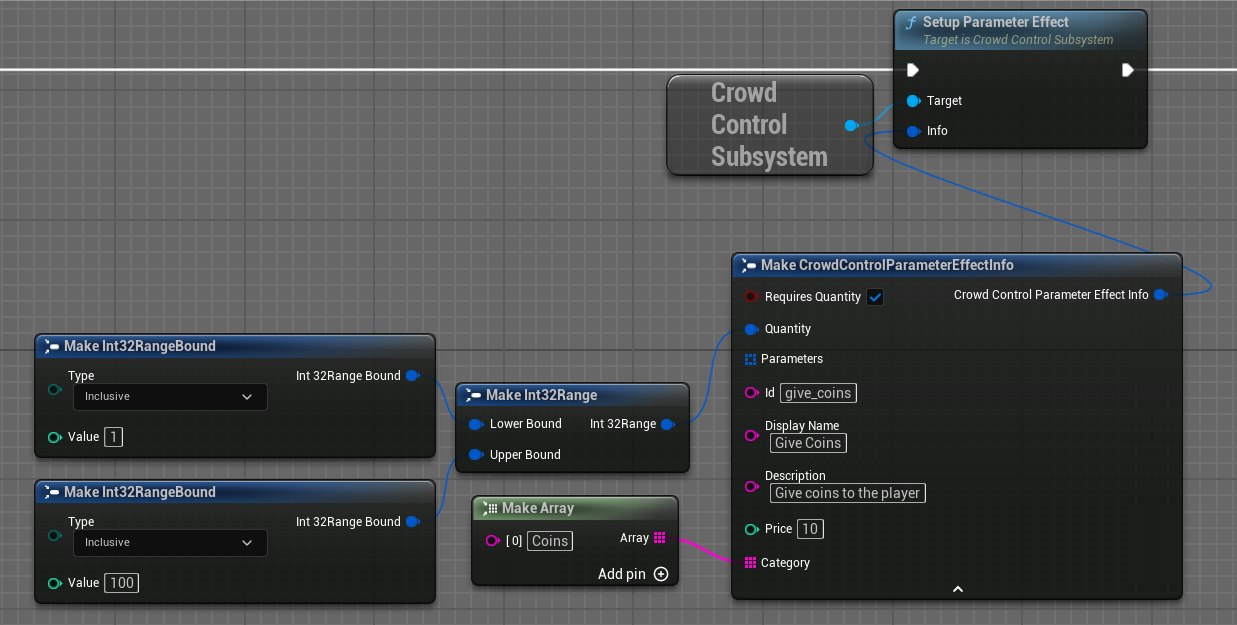
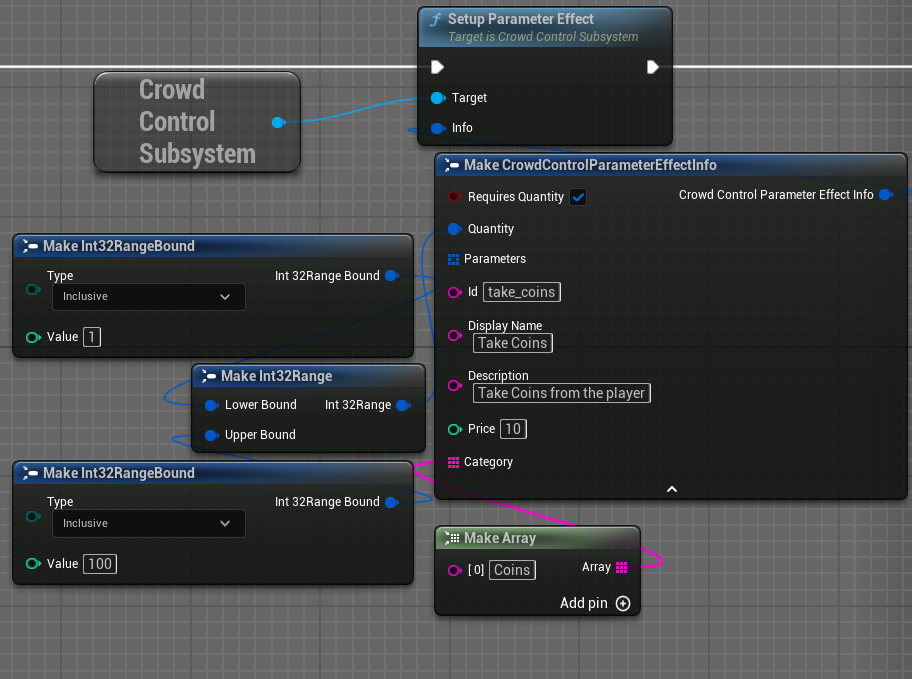
The first step is registering the effects for the menu. Each item can be added via the functions, "Setup Effect", "Setup Timed Effect", "Setup Parameter Effect". Effect IDs must be lower case with no spaces. In the example project you can see multiple examples of these: 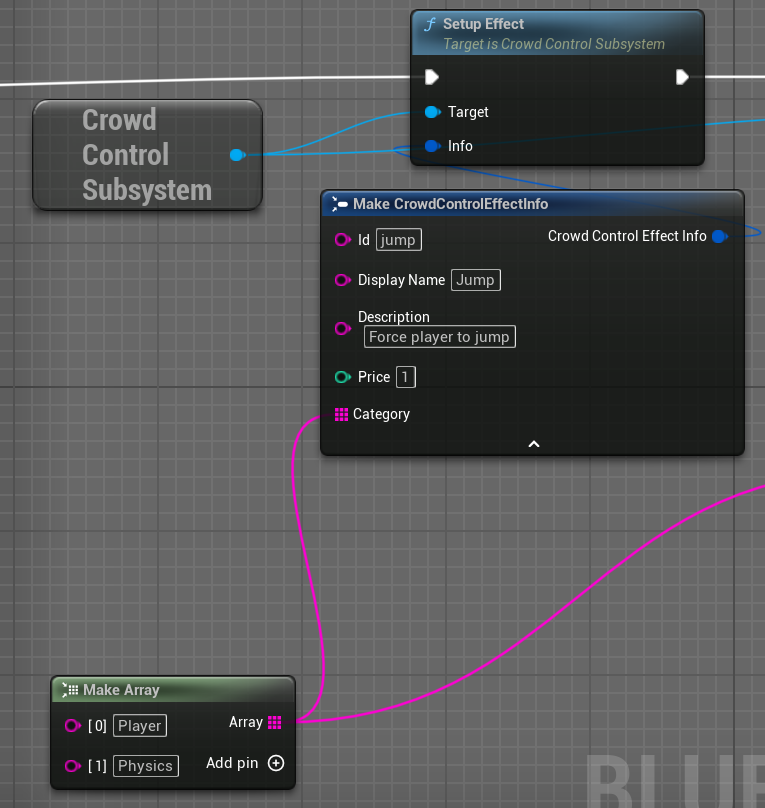

Next in the sequence we register callbacks for when an event is triggered. There are three types, "OnEffectTrigger", "OnTimedEffectTrigger", "OnParameterEffectTrigger". 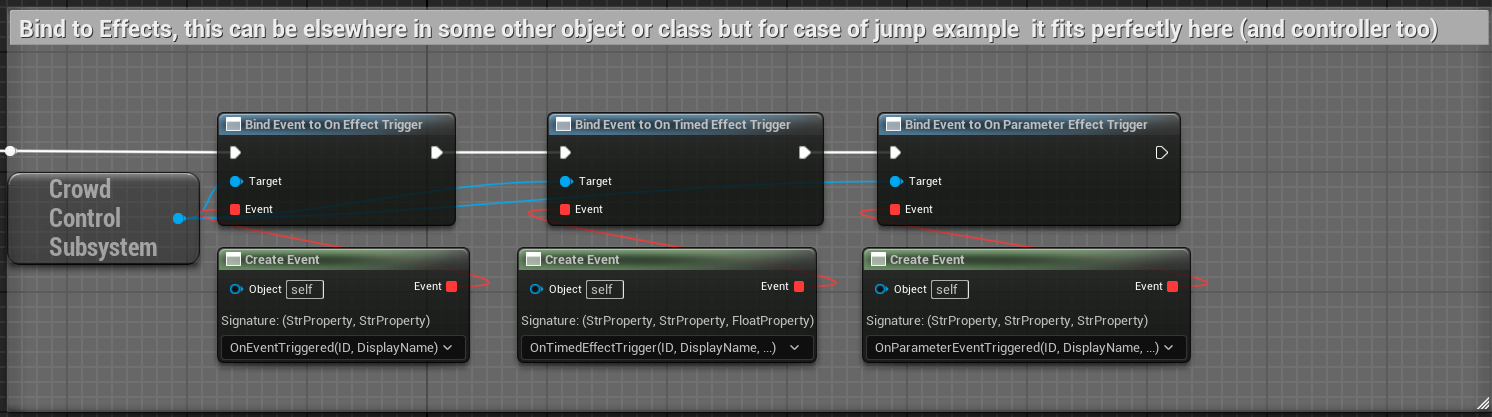
Now when an effect is triggered depending on the type one of your bound functions will trigger. This will happen across the project so you can bind to these in different types of objects all at once.
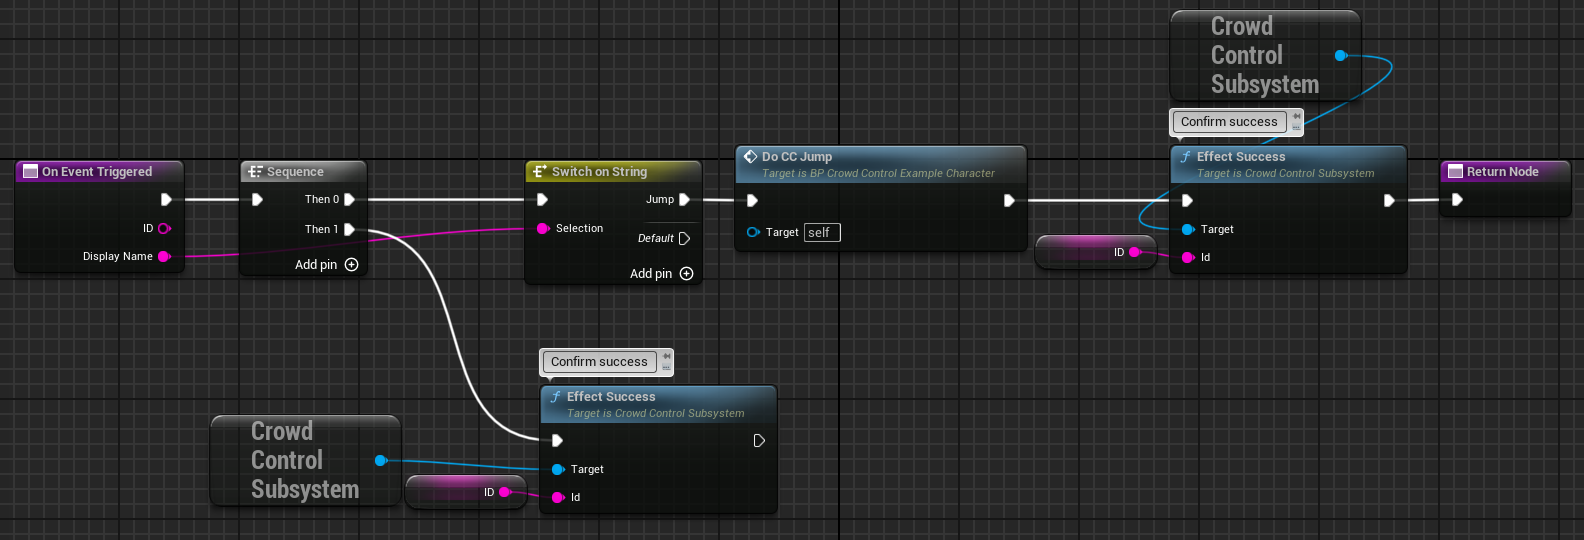
Let's take a look at the simplest one, OnEventTrigger. It provides ID (the request ID), Display Name (the display text of the effect triggered), and Effect ID (the effect's registered ID). Every triggered effect must be answered so the CC backend knows whether to charge or refund the viewer:
- Effect Success - the effect was applied.
- Effect Failure / Effect Failure Temporary - the effect can't run right now; the viewer is refunded and the effect may be retried.
EffectFailureTemporaryalso accepts a message shown to the viewer explaining why. - Effect Failure Permanent - the effect can never run; it will not be retried. Also accepts a message.
The response does not need to be sent immediately from the trigger event - asynchronous handling (latent nodes, timelines, level loads) is fine, as long as one of the responses is eventually sent with the request ID.
You can see here we check the event name and if it's "Jump" then we make the character jump with our jump function and inform CC that it succeeded.
OnTimedEffectTrigger provides an additional paramater "Duration" which is the length of time the effect will run. Here we invert the camera, inform CC that the effect was successful and wait the duration before resetting. 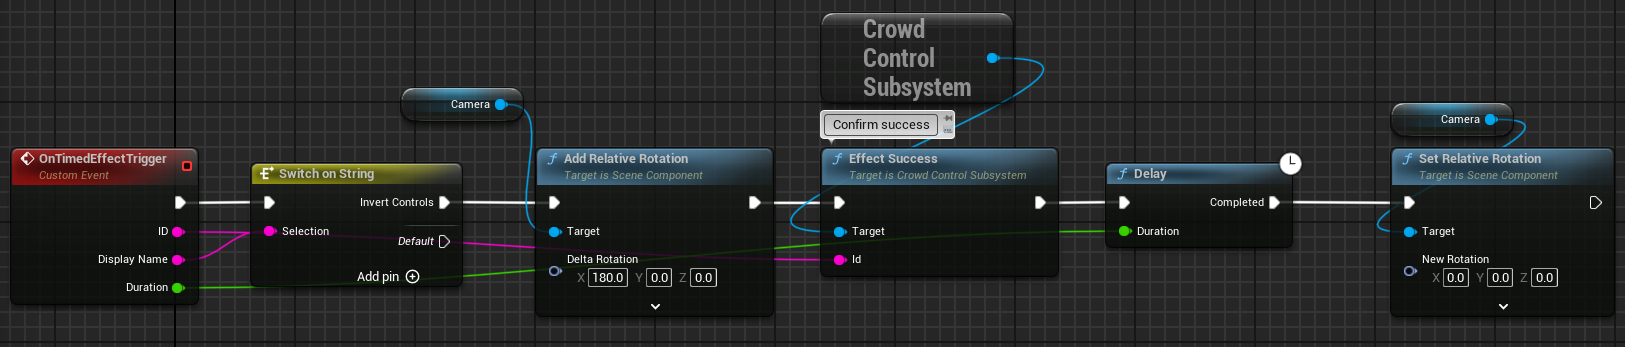
The most complex is OnParameterEventTriggered, where we recieve option as a string. In this case the option string that is given is based on how you setup the event, and what you're expecting. It may be a name, or a number value. You can explore how the example has setup color selection and numbers. 
All thats left is submitting your application when you're ready.