Creating a Basic Effect
UCrowdControlEffectComponent is the simplest way to build instant and timed effects. One component owns one effect's menu metadata, request routing, response, and timed lifecycle.
Create an Effect Blueprint
Create a Blueprint subclass of the component so its trigger function can be overridden:
- In the Content Browser, select Add > Blueprint Class.
- Expand All Classes, search for
CrowdControlEffectComponent, and select it as the parent class. - Name and open the new component Blueprint.
- Select Class Defaults and configure:
| Property | Meaning |
|---|---|
| Effect ID | Stable, unique pack ID. Use lowercase with no spaces, for example forcejump. |
| Display Name | Viewer-facing name, for example Force Jump. |
| Description | Short explanation shown in the menu. |
| Price | Default coin price; minimum 1. |
| Categories | Menu category names. |
| Duration | 0 for an instant effect. Timed effects are covered separately. |
| Auto Register | Disable this for actors already present when the game starts; register from OnSessionReady. |
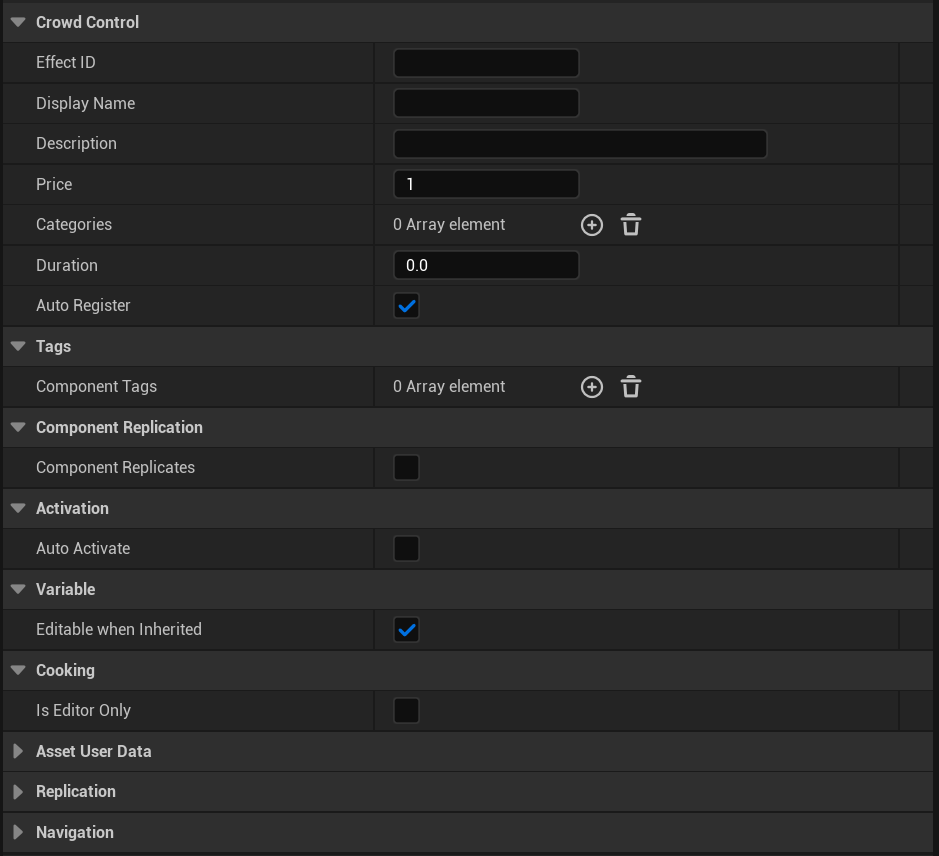
The image shows the component's initial fields. Supply the effect metadata for your game and, for a level-placed owner, clear Auto Register before continuing.
- Open the Actor Blueprint that should own the effect.
- Select Add Component, search for the new component Blueprint by name, and add it.
Keep the owning actor alive for as long as the effect should be routable. Adding the base component directly to an Actor exposes its settings, but its overridable functions belong to the component and cannot be implemented in the owning Actor's Event Graph.
Register the Component
In the object that handles OnSessionReady, call Register on the component. Registration:
- builds an
FCrowdControlEffectInfo(or timed info when Duration is positive), - calls the subsystem's setup function, and
- maps the effect ID to this component for trigger routing.
If the component is spawned after IsInitialized is already true, its default Auto Register behavior can be used instead.
Implement On Effect Triggered
Open the component Blueprint. In My Blueprint > Functions, open the Override menu and select OnEffectTriggered. The same menu contains the timed lifecycle functions.
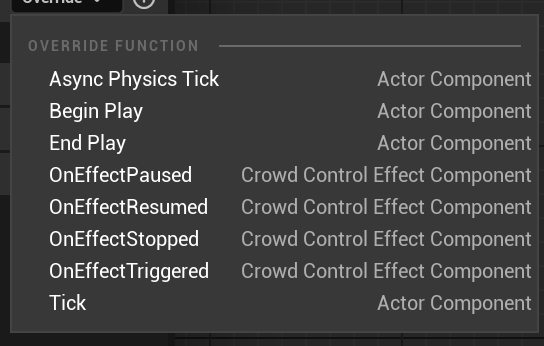
The override receives:
RequestID: unique request ID used for responses,Quantity: viewer-selected quantity, or the default quantity,Parameters: JSON object containing parameter selections,ViewerName: display name of the viewer; it may be empty for tests.
Apply the gameplay change and return one ECrowdControlEffectResult:
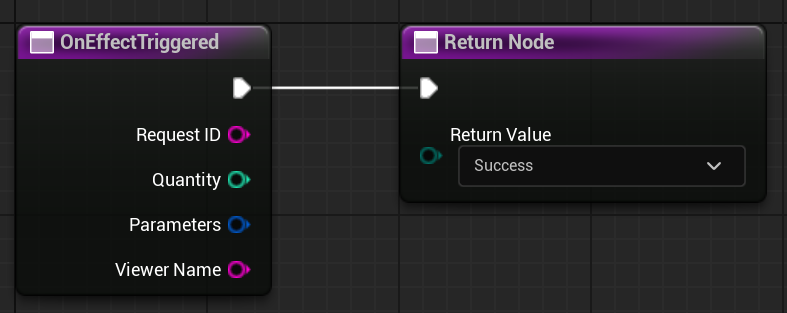
The minimal graph above accepts the request but does not change gameplay. Add the effect's gameplay nodes before the Return Node.
| Result | Use |
|---|---|
| Success | The effect ran. The component reports success automatically. |
| Fail Temporary | The effect cannot run now. Crowd Control may retry it and the viewer is not charged for a failed request. |
| Fail Permanent | This request can never run successfully and must not be retried. |
| Pending | Work continues asynchronously; no response is sent yet. |
For Pending, eventually call exactly one of:
- Complete Success
- Complete Fail Temporary with a viewer-facing message
- Complete Fail Permanent with a viewer-facing message
Do not also call the subsystem's response functions for a request that the component answers automatically.
Show a Purchase Notification
Bind OnEffectRequestReceived on the subsystem to show messages such as “Viewer sent Force Jump!” It fires before routing for every request, including component-handled effects.
This event is informational. The component or global delegate still has to answer the request.
Control Menu State
Call these functions on the component after registration:
- Set Visibility shows or hides the effect.
- Set Availability enables or disables purchases.
Visibility and availability are independent. For example, a boss effect can remain visible but unavailable before the encounter, or be hidden entirely.
For multiple manually registered effects, the subsystem also provides:
ShowEffectsByIDs/HideEffectsByIDsEnableEffectsByIDs/DisableEffectsByIDs
An empty ID array applies those bulk functions to all registered effects.
Reuse an Implementation with Clones
After the source effect is registered and the subsystem is initialized, call Clone Effect or Clone Effect to IDs. Requests retain the cloned destination ID but route to the source component.
Destination IDs must be non-empty, unique, and not already registered. CloneEffectToIDs is atomic: if the DLL rejects the set, none of the requested clones are added.
Branch on the node's Boolean return value so invalid IDs, incorrect registration order, or an incompatible native DLL are visible during setup. See Clone Registered Effects for the complete Blueprint workflow.