Prefab
The Crowd Control Manager Prefab
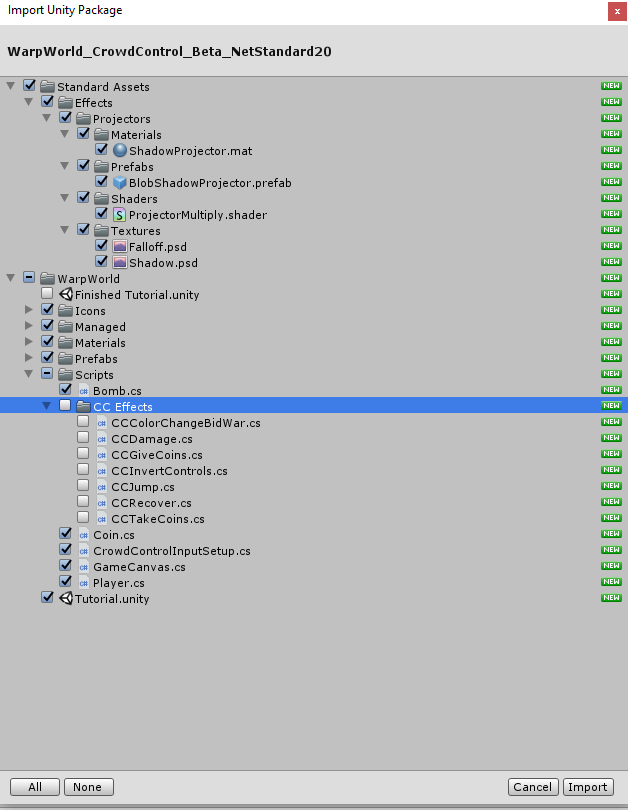
First, import the appropriate Crowd Control Package for your project. It can be found at: https://github.com/WarpWorld/crowd-control-unity-plugin. If you wish to follow the tutorial step by step, exclude the files listed below. You can always re-import them later and use them as a reference

After importing the appropriate files, begin by opening the "Tutorial" scene.

Adjusting for Unity's Universal Render Pipeline (URP)
You can skip this section if you're using the standard renderer.
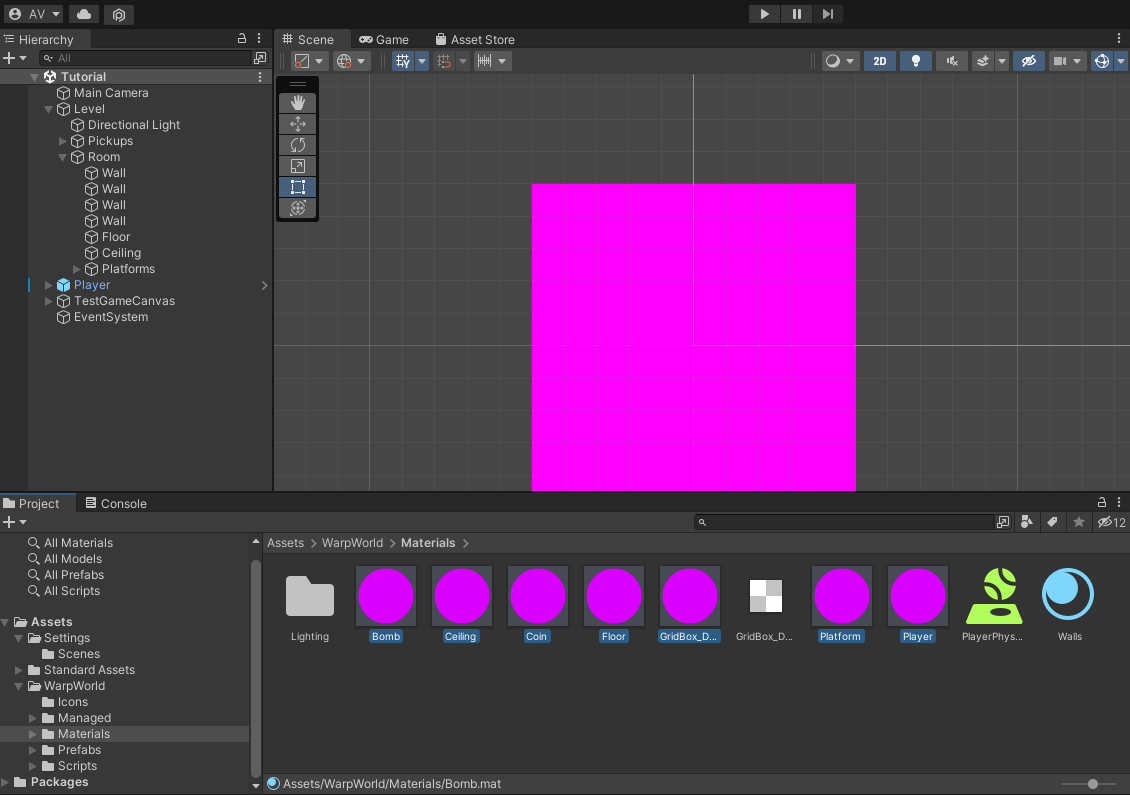
If you're using URP, you will need to perform a few extra steps to get the tutorial's scene to display the textures correctly.

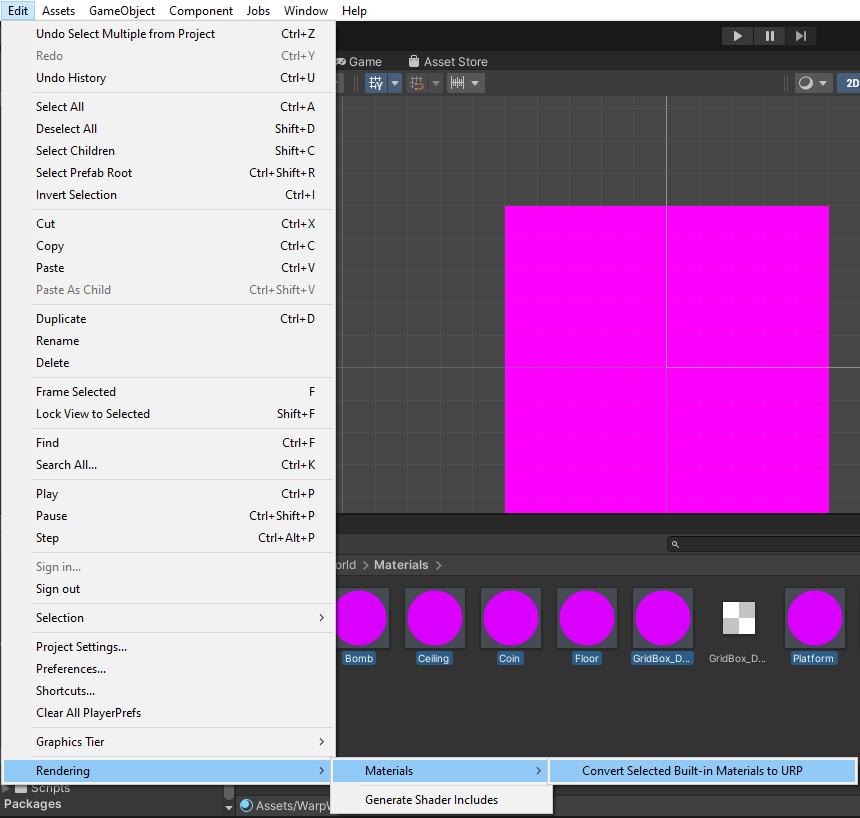
Navigate to the WarpWorld -> Materials folder and select all of the materials. While they are selected, click Edit -> Rendering -> Materials -> Convert Selected Built-in Materials to URP. 
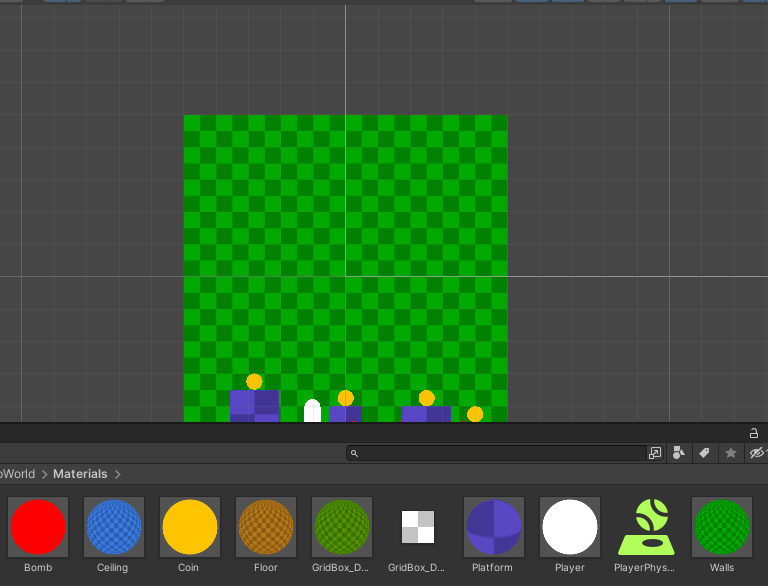
After clicking "Proceed" in the Material Upgrader popup, the textures in the scene should now show up properly.

Adding and Modifying the Prefab
The Crowd Control Manager drives all of the Crowd Control commands during gameplay. To locate the prefab:
- Navigate to WarpWorld -> Prefabs -> Crowd Control Manager
- Drag the prefab onto your scene.
- Click on the prefab after dragging it into your scene to see its properties in the inspector.

The prefab has the following fields that you can modify:
Game ID
The ID for your game is labeled as "UnityDemo," which is the default used for testing. After you submit an application for your game, you'll be assigned a specific Game ID. For now, let's retain the default "UnityDemo.
Game Name
The name of the game that will be displayed to viewers in the stream's Crowd Control Menu.
Reconnect Retry Count
If disconnected through an error (eg: Lost connection), the manager will attempt to reconnect to the server a specific amount of times before giving up. Use -1 for unlimited attempts.
Reconnected Retry Delay
This specifies the duration, in seconds, between each reconnect attempt.
Delay Between Effects
The minimum wait time, in seconds, before another effect can be triggered.
Icons
The three default icons to show up for Crowd Control effects.
- Normal Effect
- Pooled Effect
- Unknown Sender Effect
Don’t Destroy On Load
"Determines if the prefab should be preserved when switching between scenes.
Debug Output
Whether to print Crowd Control related outputs to the console.
- Log
- Warning
- Error
- Exception
Clear Saved Tokens
Clears all saved login sessions.
Effect JSON
Opens a new window displaying the complete JSON manifest for all your effects. Once you've finished adding your effects, please send this manifest to us.
